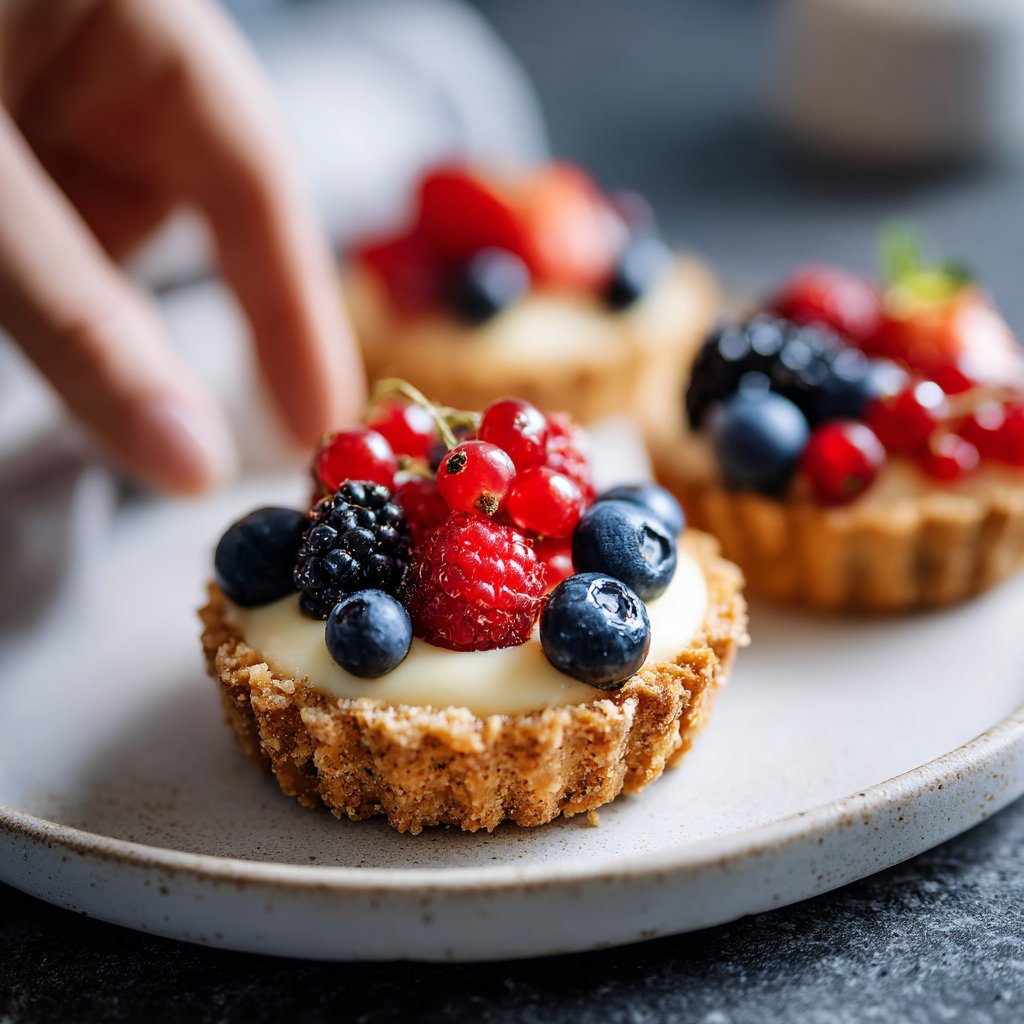
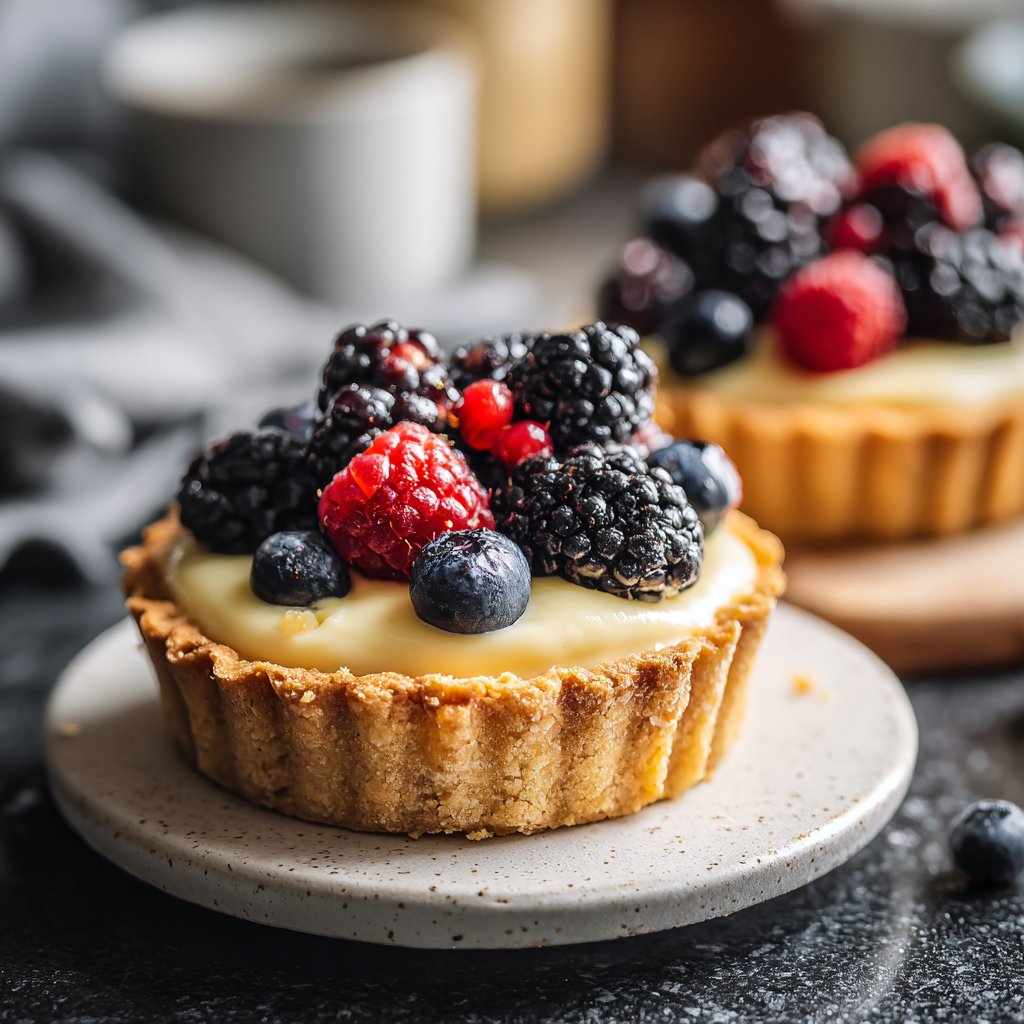
Mini Lemon Tarts with Berries
Highlighted under: Sweet Baking
I absolutely adore these Mini Lemon Tarts with Berries! The bright, zesty lemon filling combined with the fresh, juicy berries creates a perfect balance of tartness and sweetness. Every bite is a burst of flavor that instantly lifts my spirits. I love how easy they are to make, too; they are an excellent option for gatherings or just a delightful treat at home. Plus, they look stunning on any dessert table. Let me show you how to whip these up effortlessly!
Making these Mini Lemon Tarts with Berries was such a delightful experience! I spent a sunny afternoon experimenting with the lemon curd, and it turned out beautifully smooth and creamy. I realized that using fresh lemon juice really enhances the flavor, making it vibrant and uplifting. The addition of berries not only adds a pop of color but also a refreshing contrast to the tangy filling which delighted my taste buds!
One tip I learned while making these tarts is to let the lemon curd cool completely before adding it to the crust. This prevents the crust from becoming soggy, ensuring a perfect crunch with every bite. I served them at a friends’ gathering, and they were gone in no time!
Why You'll Love These Mini Lemon Tarts
- Zesty lemon filling that brings a burst of sunshine to your day
- Beautifully topped with fresh berries for a colorful presentation
- Easy to make and perfect for any gathering or celebration
Perfecting the Crust
Achieving the ideal tart crust is key to these Mini Lemon Tarts. Start by ensuring that your butter is soft but not melted, as this helps create a flaky texture. When mixing the components, be careful not to overwork the dough; it should be crumbly but hold together when pressed. Pressing the dough evenly into the tartlet pans is crucial for even baking. Look for a light golden color as a sign of doneness, usually around the 10-12 minute mark.
Additionally, pricking the bottoms of the crusts with a fork is an essential step. This allows steam to escape while baking, helping to prevent a soggy bottom. If your crusts puff up slightly during baking, simply press them down gently with the back of a spoon as soon as they come out of the oven. Allowing the crusts to cool completely before filling them helps maintain their structure and prevents the filling from soaking in.
Crafting the Lemon Filling
The lemon filling is where the tarts truly shine. Achieving the right balance of sweetness and tartness is key, so be sure to taste the mixture before adding the heavy cream. The whisking step is crucial; it keeps the eggs from scrambling when heated. Stir consistently and keep a close eye on the mixture to avoid overcooking, which can lead to a rubbery texture. Once thickened, the filling should coat the back of a spoon and have a glossy appearance.
To enhance the lemon flavor, consider using freshly squeezed lemon juice and freshly grated lemon zest. The brightness from fresh citrus will elevate your tarts significantly compared to bottled alternatives. Allowing the filling to cool slightly before pouring it into the crust helps prevent it from cracking upon filling. This step will ensure a smooth and professional-looking tart.
Serving and Variations
These Mini Lemon Tarts can be stored in the fridge for up to three days, making them an excellent make-ahead option for gatherings. To ensure the crust remains crispy, wait to add the berries until just before serving. If you want to customize the flavors, consider infusing the cream with herbs like basil or rosemary for a unique twist on the classic lemon filling. You could also swap the berries for seasonal fruits, such as peaches or cherries, depending on what’s available.
When serving, a light dusting of powdered sugar over the top of the tarts can add an elegant touch, and fresh mint leaves not only look beautiful but add a refreshing aroma. For an added crunch, you can add a sprinkle of chopped nuts like almonds or pistachios on top of the berries. These small tweaks can transform the presentation and flavor profile, making your tarts even more inviting.
Ingredients
Gather your ingredients before starting the recipe:
For the Crust
- 1 1/4 cups all-purpose flour
- 1/2 cup unsalted butter, softened
- 1/4 cup powdered sugar
- 1/4 teaspoon salt
- 1 large egg yolk
For the Lemon Filling
- 1/2 cup granulated sugar
- 1/4 cup fresh lemon juice
- 1 tablespoon lemon zest
- 3 large eggs
- 1/2 cup heavy cream
For Topping
- Fresh berries (strawberries, blueberries, raspberries)
- Mint leaves for garnish (optional)
Once your ingredients are ready, we can start making the tarts!
Instructions
Follow these steps to create your Mini Lemon Tarts:
Make the Crust
Preheat your oven to 350°F (175°C). In a mixing bowl, combine flour, softened butter, powdered sugar, and salt. Mix until crumbly. Add the egg yolk and mix until a dough forms. Press the dough into the tartlet pans evenly. Prick the bottoms with a fork and bake for 10-12 minutes until golden.
Prepare the Lemon Filling
In a saucepan over medium heat, whisk together sugar, lemon juice, lemon zest, and eggs until combined. Stir consistently until the mixture thickens (about 5 minutes). Remove from heat and stir in heavy cream. Let it cool slightly.
Assemble the Tarts
Once the crusts are cooled, pour the lemon filling into each tart shell. Refrigerate for at least 1 hour to set. Before serving, top with fresh berries and garnish with mint leaves if desired.
Enjoy your delightful Mini Lemon Tarts with Berries!
Pro Tips
- For the best flavor, use freshly squeezed lemon juice. Feel free to mix different berries for topping to match your preference.
Storage Tips
To keep these Mini Lemon Tarts fresh for longer, store them in an airtight container in the refrigerator. They will last about three days, but I recommend enjoying them within the first two days for the best texture. To maintain the crust's crispness, avoid covering them directly with plastic wrap; instead, place a paper towel over them before sealing in the container. This allows for some airflow without drying them out.
If you wish to make the tarts ahead of time, prepare the crusts and fill them just before serving. You can even freeze the crusts for up to a month! Just ensure they are completely cooled and well-wrapped. When you're ready to use them, thaw them in the fridge overnight and fill with the lemon mixture for a quick summertime treat.
Common Troubleshooting
If your lemon filling curdles during cooking, it may be because of the heat being too high. Always use medium heat and never stop stirring, as this helps create a smooth and creamy texture. If you find that the filling is too thick, you can whisk in a bit more heavy cream off the heat to loosen it up gently without affecting the flavor.
For those who may find the tarts too tart, adjusting the sugar levels in the filling is completely acceptable! Start with a small increase in sugar or consider adding a touch of vanilla extract to round out the flavors without compromising the lemony essence.
Questions About Recipes
→ Can I make the crust ahead of time?
Yes, you can prepare the crust a day in advance. Just store it in the refrigerator until you're ready to fill it.
→ How long do these tarts stay fresh?
They are best enjoyed within 3 days when stored in the refrigerator.
→ Can I use store-bought crust?
Absolutely! A store-bought tart crust can save you time and still taste delicious.
→ What other fruits can I use as toppings?
You can use any fruit you like, such as kiwi, blackberries, or even sliced peaches for a unique twist.
Mini Lemon Tarts with Berries
Created by: The Chefleoskitchen Team
Recipe Type: Sweet Baking
Skill Level: Intermediate
Final Quantity: 12 tarts
What You'll Need
For the Crust
- 1 1/4 cups all-purpose flour
- 1/2 cup unsalted butter, softened
- 1/4 cup powdered sugar
- 1/4 teaspoon salt
- 1 large egg yolk
For the Lemon Filling
- 1/2 cup granulated sugar
- 1/4 cup fresh lemon juice
- 1 tablespoon lemon zest
- 3 large eggs
- 1/2 cup heavy cream
For Topping
- Fresh berries (strawberries, blueberries, raspberries)
- Mint leaves for garnish (optional)
How-To Steps
Preheat your oven to 350°F (175°C). In a mixing bowl, combine flour, softened butter, powdered sugar, and salt. Mix until crumbly. Add the egg yolk and mix until a dough forms. Press the dough into the tartlet pans evenly. Prick the bottoms with a fork and bake for 10-12 minutes until golden.
In a saucepan over medium heat, whisk together sugar, lemon juice, lemon zest, and eggs until combined. Stir consistently until the mixture thickens (about 5 minutes). Remove from heat and stir in heavy cream. Let it cool slightly.
Once the crusts are cooled, pour the lemon filling into each tart shell. Refrigerate for at least 1 hour to set. Before serving, top with fresh berries and garnish with mint leaves if desired.
Extra Tips
- For the best flavor, use freshly squeezed lemon juice. Feel free to mix different berries for topping to match your preference.
Nutritional Breakdown (Per Serving)
- Calories: 210 kcal
- Total Fat: 14g
- Saturated Fat: 8g
- Cholesterol: 80mg
- Sodium: 60mg
- Total Carbohydrates: 20g
- Dietary Fiber: 1g
- Sugars: 10g
- Protein: 3g